Where the wild things are
Life lessons from my backyard catio build
On The Cusp is about becoming the next version of ourselves. That means experimenting with the breadth of our interests, exploring the depths of anything that captures our imagination, and learning to embrace uncertainty along the way.
Welcome! This is letter #60.
We were about to turn in for the night. That is, until we heard the plaintive meow.
That’s how a skinny, fleabitten stray kitten scored a cozy—albeit temporary—home with us this week. When our search for a microchip or owner proved fruitless, we found him a forever family as loving as he is.
Apparently, this is what happens when you build a backyard catio: you brand yourselves to the local feline population as the Neighborhood Cat People™️.
By popular demand, I’m taking a break from my regular newsletter programming to recap our recent catio build—so if you’re curious how my backyard went from overgrown dandelion field to cat paradise this summer, you’re in luck!
But ultimately, today’s newsletter is really about what happens when you tackle a big, complicated project and see it through to the finish line. (That’s something even dog people can get behind.)
Two months ago, I could perform basic home maintenance and improvement tasks, but had zero construction experience. Today, while I can’t claim to have performed the bulk of this project’s construction work (folks, my boyfriend is a saint!), I do know a lot more—both about building stuff, and about life.
Below, I’ll share the “what” and the “how” of this project. And with those steps as context, I’ll share the bigger-picture lessons I’m taking away.
Step 1: Research! After buying a catio plan, we had to figure out what kind of surface to put the structure on—and decided that building a paver patio was the best choice.
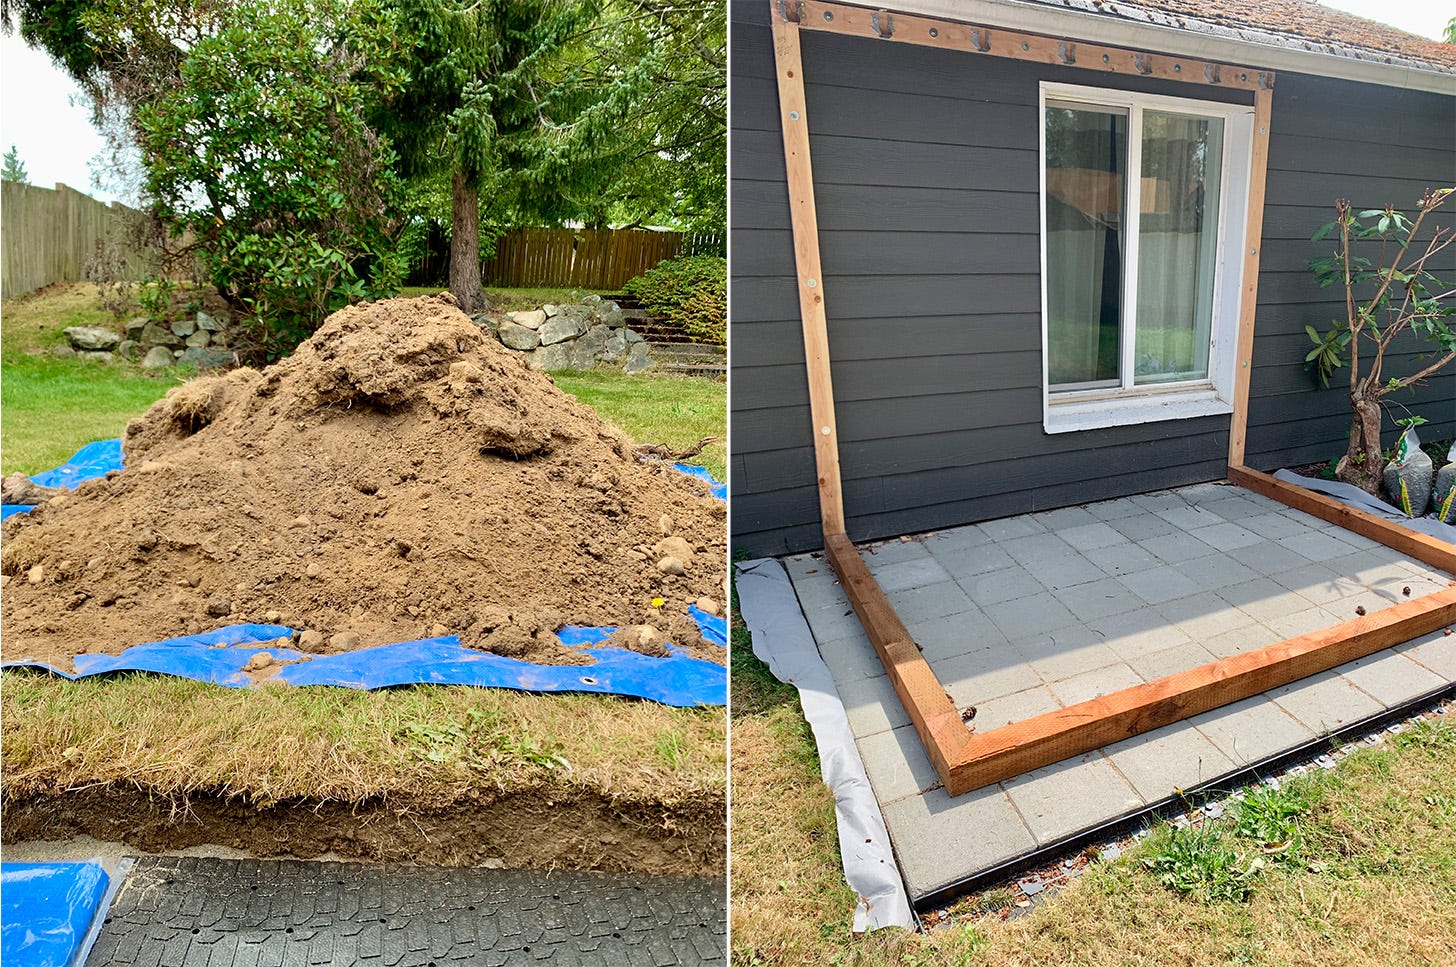
Step 2: Prep the patio site. After making sure our dig site was free of utility lines, we used a pickaxe, flat shovel, and tamper to dig and level a site with nice, clean edges.
Step 3: Build the patio. We put down weed matting and screeded paver sand, then put down panels of Brock PaverBase, edge restraints, and 63 concrete pavers. When it looked perfect, we sealed the seams with polymeric sand and bought pea gravel to fill the space bordering the patio.
Step 4: Clean up. Because all the dirt we excavated had to go somewhere!
Step 5: Build the catio frame. We cut and screwed together three 4x4s as a base, then attached a set of 2x4s to the side of my house—no small feat, because it’s made of cinderblocks.
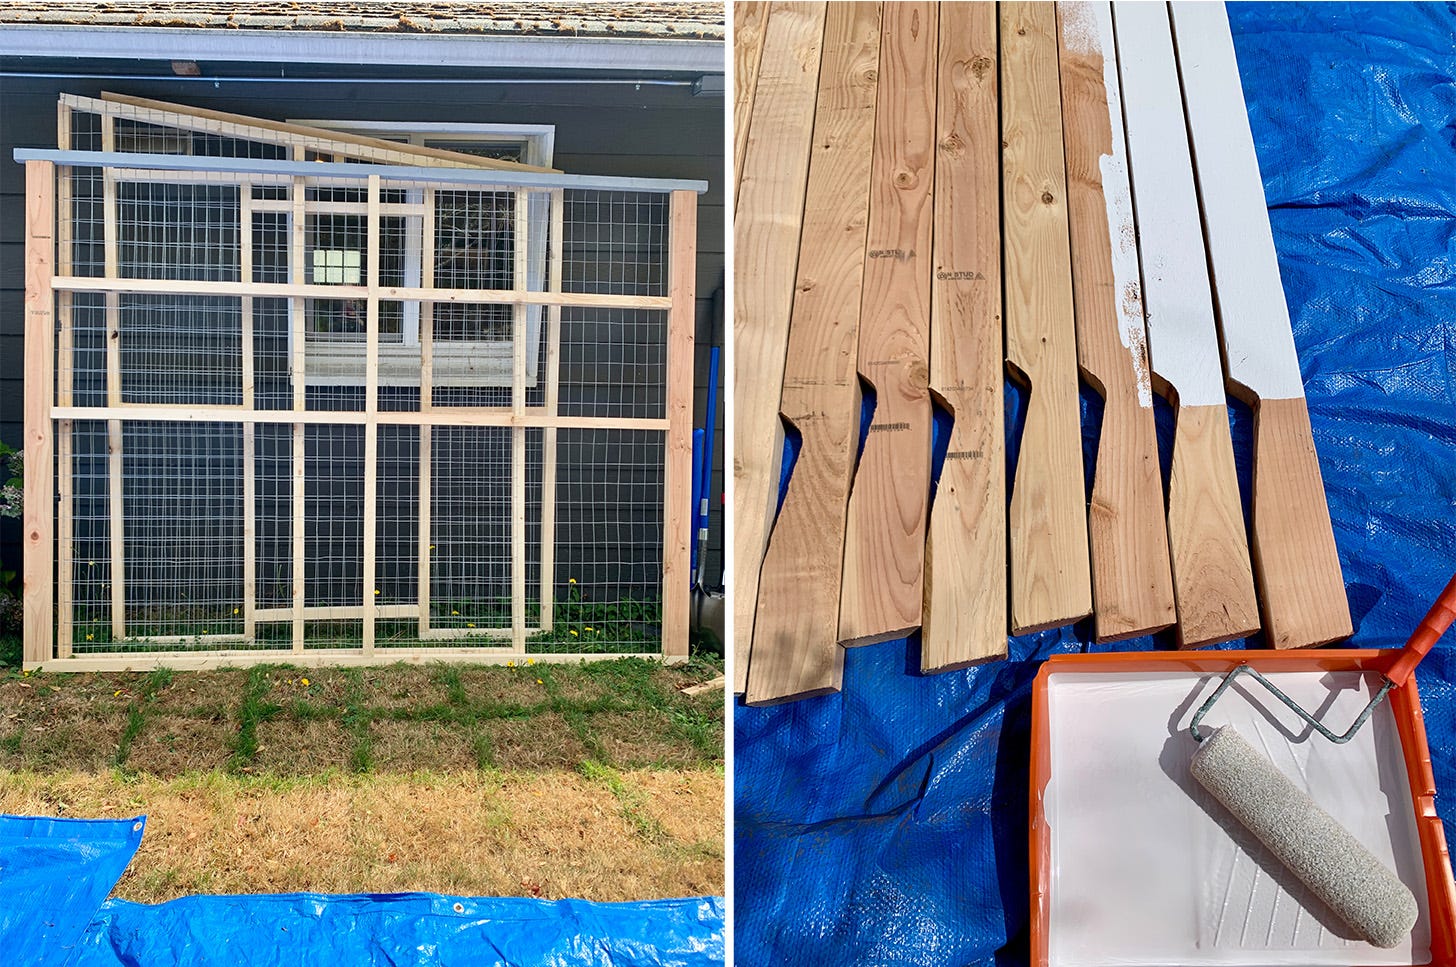
Step 6: Build the side panels. We cut and screwed together a series of 2x2s and 2x4s and stapled pet-proof wire fencing to each panel.
Step 7: Prime and paint the panels and rafters. We applied oil-based primer and two coats of Sherwin-Williams Urbane Bronze to weatherproof everything (and match the siding).
Step 8: Affix the panels to the frame and hang the rafters. This is when it started looking like a real catio!
Step 9: Hang a (lockable) door. For what it’s worth: building a door that fits perfectly into its frame is no small feat.
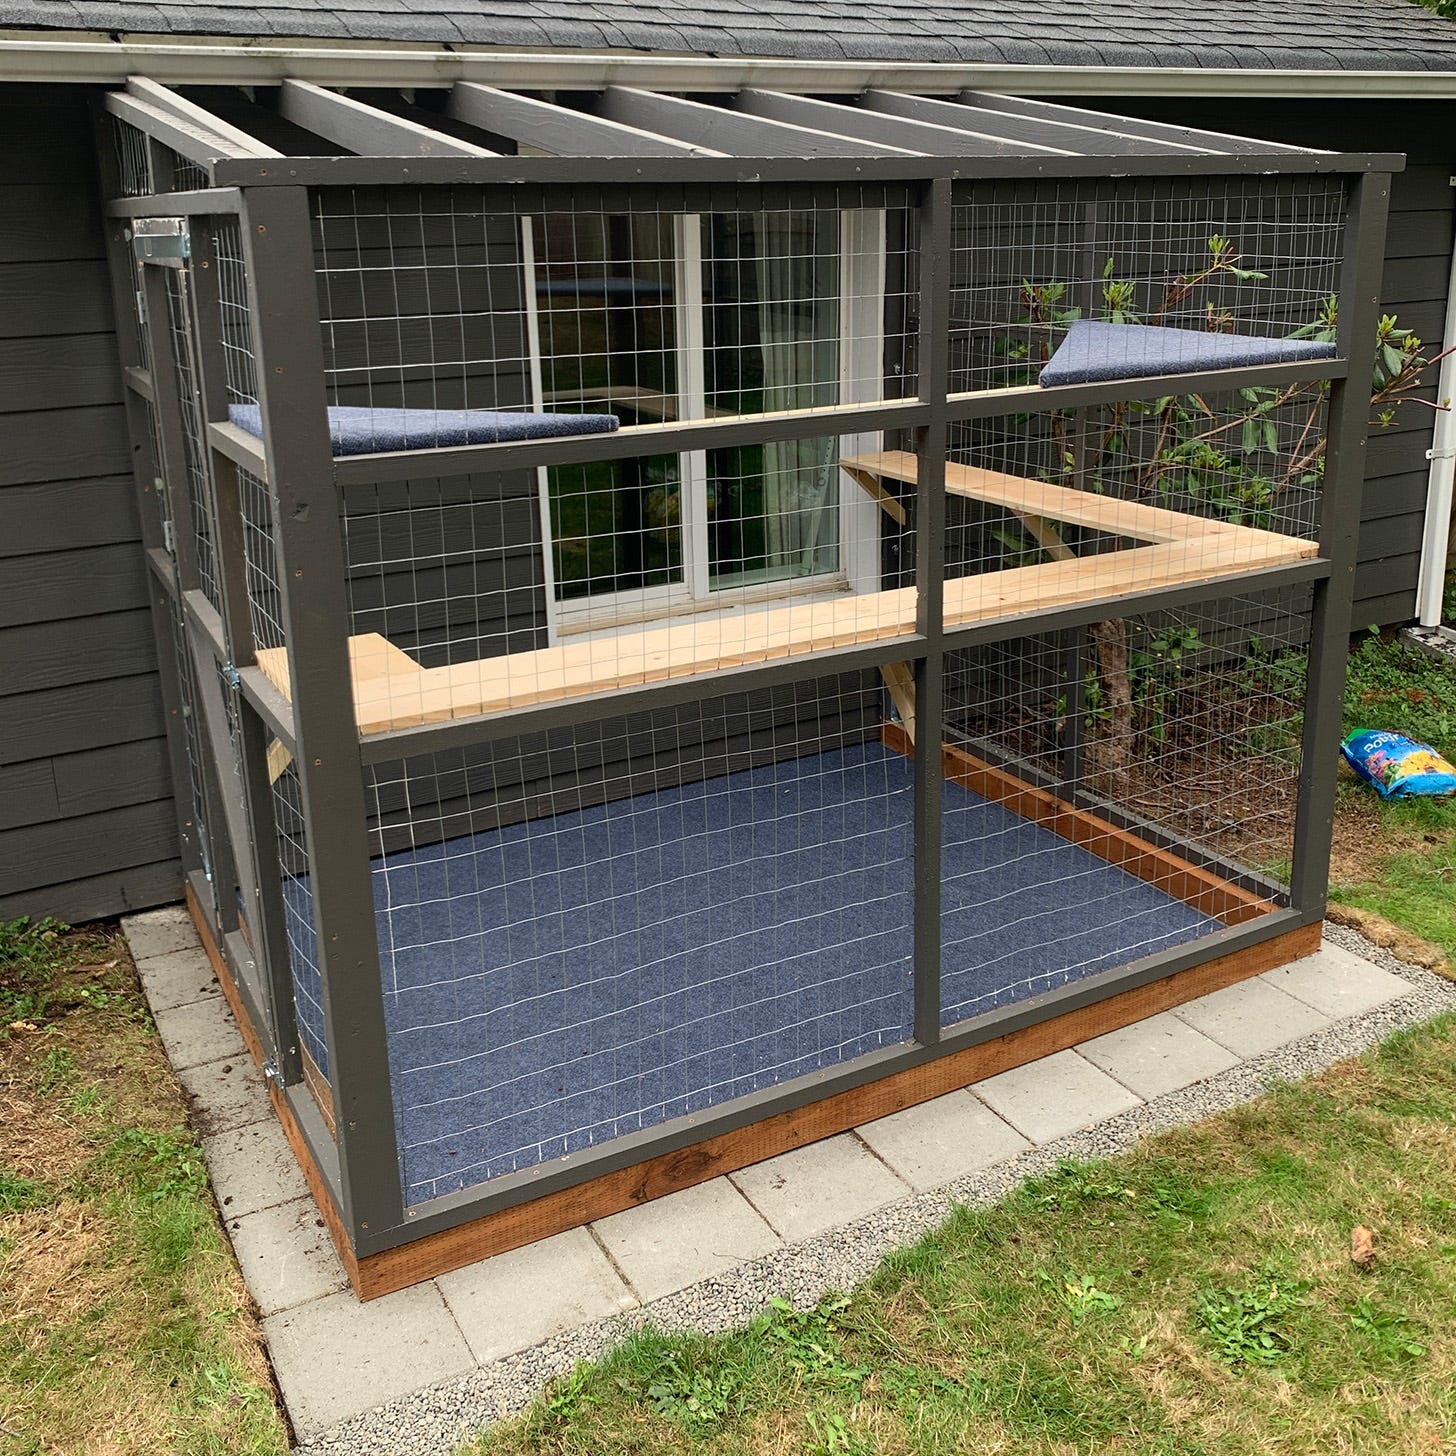
Step 10: Create shelving. This was the fun part—figuring out the right configuration of shelves for the cats to jump on. We added marine-grade carpet to the two triangle shelves, sealed the exposed wood, caulked the seams, and touched up the paint.
Step 11: Add a roof. We decided on a clear polycarbonate roof so it wouldn’t block the light in my adjoining office—and would keep the cats dry during our rainy Pacific Northwest winters.
Step 12: Add a cat door. Finally, we added a window insert with a cat door so the little ones could head out at their leisure.
Step 13: Emotionally prepare yourself to never see your pets again. I’m lucky the catio is visible from my office window, because it is officially the hottest ticket in town.
📝 The Prep
The most valuable degree is from YouTube University. Take any confounding project, then watch a couple of videos on the subject. It won’t make you an expert, but you will have a transformed understanding of how that once-mysterious thing comes together…all in twenty minutes or less.
A new challenge is the best “asking for help” practice there is. Like when you’re in the fastener section of—where else?—Home Depot, with a nearly incomprehensible list of screws, bolts, nails, hangers and hasps you have to find.
Take your planned timeline, then multiply it. I read a review that described this catio plan as “a nice weekend project.” (We finished it two months later.)
Save time and energy where you can. I could have saved an $80 home delivery fee by picking up all the monstrously heavy patio materials myself. It was the best $80 I’ve ever spent!
🛠️ The Work
When they see you working, people will start offering to help. This project brought me closer to my neighbors, who started lending their tools, time, and expertise as soon as we arrived home with lumber in tow.
The right tools make the job infinitely easier. Acquire them upfront; this is not wasted time. If I could time-travel, I would’ve bought a wheelbarrow on Day One.
One man’s trash… You know the rest. The night before we had to take the aforementioned pile of dirt to the landfill, I posted “FREE DIRT!” on Nextdoor on a whim. The next morning, four friendly strangers were in my driveway, shovels in hand, thanking me for making their new garden bed possible.
Occupy your mind while you occupy your hands. Once I started treating my solo catio-build tasks as an opportunity to listen to audiobooks and podcast interviews, I started looking forward to the attendant manual labor.
Doors aren’t magical. They’re a pile of materials: in our case, a 2x4, some 2x2s, hinges, screws, a barrel bolt and two safety hasps. But that is kind of magical, right? Because once you recognize the building blocks of any given thing, it’s within your reach to make it.
There’s more than one way to do just about anything. Every problem we encountered ended up having multiple reasonable solutions. This taught me to stop clutching so tightly to the instruction manual!
“Measure twice, cut once” isn’t a silver bullet. Even if you’re careful and plan ahead, it still won’t absolve you of the need to make that fortieth trip to Home Depot. It just won’t. Just…learn to love those ✨special moments✨ at Home Depot.
🏠 The Results
Find joy in selflessness. At some point, I asked my boyfriend: “Once the catio’s done, do you think the cats will appreciate us?” After a moment of consideration, he responded: “No. But I think they’ll appreciate it.” He was right—and I love watching them enjoy their new space regardless.
When you’re in short-term creative mode, it’s refreshing to tackle a long-term project. It was fun to tackle work in sweeping stages, rather than weekly-ish newsletter “deadlines.” (And I bet the opposite would be true for anyone slogging through a long-term project!)
A big push forward in one area of life requires treading water—or stepping back—in others. This summer, I had less time to focus on my other commitments, interests, and priorities…which led to some frustration and FOMO, until I accepted the temporary nature of this project. Everything has its season!
A big push forward also tends to deliver disproportionate results. Yes, I wish I’d written more essays this summer, designed more websites, recorded more videos, and been more consistent with my workouts. But making a single big investment of time and energy also delivered huge (and durable!) results.
It’s easier to change your identity and skillset than you might think. You just have to commit—and begin acting. Do the next smallest step enough times, and you’ve found the secret to “becoming a person who can [fill in the blank].”
New skills transform your sense of possibility. My new abilities—and my new can-do attitude—helped me realize that other “unattainable” backyard transformations are totally within reach.
Nothing beats completing stuff you bought plans for, not knowing if you’d follow through. Every time I look outside at the completed structure, it’s delicious to recall the first day I opened the catio plan PDF, wondering if I would actually take action.
Tangible accomplishments are some of the very best ones. Don’t get me wrong: I’m really proud of my cerebral, conceptual, and intangible accomplishments. But being able to point to a physical thing I helped create just…hits different.
I’ve got the world’s best boyfriend. This project wouldn’t exist without him. (I mean, of course it could have. But, since I began this undertaking as a rank beginner, it would’ve involved more mistakes, “wasted” time, and despairing tears on my part.) Bonus: it feels great to have created something as a team.
Are you following along with my year of pizza on YouTube? Here’s the latest installment of the In Depth Cookbook Club! ⬇️
Step into my kitchen, where I’m making the Pizza with Oven-Dried Tomatoes, Mascarpone, and Basil Pesto (p. 56) from Alexandra Stafford’s wonderful cookbook Pizza Night.1
As always, I’d love to hear from you. Have you built something you’re especially proud of?
Warmly,
Maddie
If you buy Pizza Night through my Bookshop.org affiliate link, you’ll be supporting this video series! That’s because each purchase made through the link earns me a small commission. All opinions are honest and entirely my own, regardless of affiliation.


I really think there's something magical about creating things we can see and working with our hands. This human need has gotten lost in our "knowledge economy" and social media world. This is such a great reminder about the joy to be found in making! And your bf is a keeper!! ❤️❤️
Look at that beautiful, happy kitty! 🙏